3.30.2013

Raspberry Chicken.

Served here with seasoned bulgar and broccoli.
Here is an incredibly easy dish that will impress anyone. Fresh raspberries are typically available year round, but if you can find fresh ones that are actually local, and in-season, even better. Serve this with couscous, rice, pasta, bulgar or whatever...and maybe a salad or veggies. The recipe serves two. The sauce can also be made ahead and refrigerated for up to a week or so.

Ingredients:

1/4 cup white wine vinegar (red works too in a pinch)
1/4 cup natural raspberry preserves, seedless*
2 Tablespoons water
2 Tablespoons soy sauce or Bragg Seasoning
1/4 teaspoon red pepper flakes

1 Tablespoon of oil
2 boneless, skinless chicken breasts, sliced thick
1-2 shallots, peeled and sliced
A few fresh raspberries

*If you have preserves with seeds, heat in a microwave first until thin and smooth, then mix with the vinegar and water. Pass through a strainer/sieve to remove seeds, and continue.

Whisk first four ingredients together until smooth. Add the pepper flakes and set aside.

Heat oil in a frying pan over medium heat until hot. Stir-fry chicken and shallots until chicken is cooked through. Transfer chicken to a plate and leave the shallots in the pan. Add the raspberry sauce to the pan and continue to simmer, scraping up any bits from the bottom, until sauce thickens to your liking. Add the fresh raspberries to the sauce and stir for a few seconds. Plate the chicken and pour sauce over. Finish with a bit of salt and pepper.  Enjoy!


3.09.2013

Stuffed Okra.


Served here with black eyed peas, sweet potatoes, and tomatoes.
Growing up in Tennessee, okra was everywhere. During the summer, when it was maturing, folks were always willing to pass along a big bag full from their gardens, which were overflowing. Some folks love it, others hate it. There are few in between. If you belong to the love camp, then you HAVE to try this recipe. If no, it might just change your mind. The slimy green veggie to which many are accustomed becomes something different with this recipe. Whole young pods are stuffed with spices and sautéed with onions until slightly browned and crisp. It's simple, though a bit time-consuming if you are making a large batch (in which case you crack open a couple of beers and get someone to help you).

This dish is perfect for any meal. It works with an Indian spread, goes with southern food really well, and fits right in on the Thanksgiving table or at a picnic (yes, it's even good at room temp). I am a huge fan of okra, and since moving to Seattle, I do have a problem finding it fresh sometimes. Your best bet is an Asian produce stand. You can find it usually at most locations in the International District much cheaper than at local grocery stores.

This recipe makes enough for two. Double the recipe for more. Don't be afraid to mix up the spices a bit and make it your own way!

If it's messy, it's okay.
You will need:

30-40 small-medium young okra
2 teaspoons ground coriander
1/2 teaspoon ground cumin
1/2 teaspoon mango powder*
1/4 teaspoon paprika
1/4 teaspoon turmeric
1/4 teaspoon garam masala
1/2 teaspoon kosher salt, or to taste
2 or 3 Tablespoons of peanut or vegetable oil
1/2 large onion, thinly sliced
A few cherry tomatoes (optional)
Cilantro (optional)
Stir-fry in hot oil.

Fry until golden brown.
Wash and dry the okra. Working with each pod separately, cut off most of the hard stem and make a long slit, from just near the stem, stopping just before the tip. Don't cut the okra into 2 parts; rather make a pocket to hold the spice mixture.
In a small bowl, mix the spices and salt. Using a small spoon or your fingers, stuff a pinch of the spice mix into each okra pod. Save any left over. If the okra splits in half, or you don't have enough spice, or it looks messy, don't fret. Everything is just fine.
Sautéed with sweet onions.
Heat a couple Tablespoons of the oil in a frying pan over medium high heat until hot. Add the stuffed pods and stir fry until beginning to brown (in batches if necessary). Reduce heat to medium and cook until browned and tender, 10-15 minutes or so. Remove okra from pan and set aside on a plate.
Add a Tablespoon or so of oil into the pan and return to heat. Increase heat slightly and add the onion. Stir-fry the onion until soft and golden brown, about 5 minutes or so. Transfer the okra back to the pan and stir gently to combine with the onion. Add any leftover spice, reduce heat to medium, and cook for another minute or two. Toss in a few cherry tomatoes and some cilantro if you like and serve.


*Mango powder can be found at Indian groceries or online. Although it isn't completely necessary, it does add a wonderful flavor to the recipe. Just go order some now and forget about it. You will be happy you did. If you wanna be stubborn and skip it, squeeze a bit of lemon over the dish just before serving instead.


3.05.2013

Your Last Beef Stroganoff Recipe.

When I developed recipes for Dinosaur Takeout last year, the greatest challenge was taking classics and adapting them for a 3-step, 30-minutes-or-less meal that still delivered flavor and quality. Our biggest seller, by far, was our Beef Stroganoff. I'm not surprised. After visiting recipe after recipe, and borrowing tips and ingredients from each one, I created one that I believe has excellent balance, rich flavor, and is a tiny bit better for you than the traditional recipe. So look no further! You will notice that the cream has been cut with some nonfat yogurt. Make sure you get natural yogurt! If the ingredients go beyond milk and enzymes, skip it. Same goes for your sour cream...it should contain cream, milk, and enzymes...no fillers. This really will make a difference. The yogurt lightens the sauce a tad, but it tastes just as good. Go ahead and make a batch and store it in the fridge. It will keep for a few days, and the flavors will combine over time. Plus, when the sauce is pre-made, cooking dinner is a snap later on.

You can't lose with this one!


This batch makes about 1 3/4 cups of sauce...plenty for two people. Double it if you'd like.

You will need:

1/2 cup of heavy cream
1/2 cup of sour cream
1/2 cup of plain nonfat yogurt
1 Tablespoon dijon mustard
1/4 cup tomato paste
1 Tablespoon Worcestershire sauce
3/4 tsp paprika
3/4 tsp ground black pepper
1 tsp kosher salt

2 Tablespoons unsalted butter
8 oz sirloin (or whatever steak you like), thinly sliced against the grain
1/2 cup thinly sliced onions
4 oz sliced mushrooms
1 Tablespoon chopped Italian parsley
2 oz cherry tomatoes (optional)

4 oz egg noodles (cook according to package directions while sauce is simmering)

To make the sauce, combine all 9 ingredients and mix well until smooth. Set aside.

For the stroganoff, heat a frying pan over medium high heat until hot. Add the butter, give it a swirl, then add the next 5 ingredients. Stir-fry until steak is cooked to your liking. Remove the steak and transfer to a side plate. Continue cooking the rest for a minute or two until onions begin to brown. Pour the sauce (as much or little as you'd like) into the pan with the onions and simmer until thickened. Return beef to the pan, toss, and serve over cooked egg noodles. Enjoy!


Indian Food 101.

You wanna cook some Indian food but don't know how? Well, follow these three steps, and you'll be on your way!

Step 1: Get yourself a good cookbook. There are many out there, and you can spend days deciding. But don't. Order a copy of The Indian Vegetarian by Neelam Batra. If you are a meat eater, order it anyway. Concentrate on building really good sauces and exploring new flavors. You can always incorporate meats and fish later on. Also, don't just dive into the recipes. Read the introduction for a basic understanding of the ingredients.

Step 2: Find a source for spices and ingredients. I'm lucky because I have an Indian grocery store nearby. I buy most of my spices in bulk (which saves tons of $$), and they are really helpful so I can ask a lot of dumb questions. Do a search and see if there is one in your neighborhood. If not, you can easily find a supplier online or make a trip to a nearby town that has one. If all else fails, try Amazon. Also, if you don't have fresh tomatoes, use canned...if you don't have fresh peas, use frozen. Take a shortcut or two and relax.

Step 3: Stock up. Collect your ingredients and get to work. The list of spices can be intimidating, but don't let it stop you. With most of the exotic spices, a little goes a long way. Buy or make yourself some chutneys, some pickles, and some spice blends (the book explains it all, and most keep for a good while). Also, if you buy whole spices, get yourself a spice grinder. A mortar & pestle works, but a grinder will make you happier. Oh, and don't use your coffee grinder to grind spices. You will regret it forever.


How to make your own Garam Masala

Garam Masala is a spice blend as common in India as salt & pepper is here. Garam means "hot" in the Hindi language. And though this blend does deliver a bit of heat due to the black pepper, the name comes from the fact that the spices included are warming spices which produce internal heat in the body. Commercial mixes are available, but they are usually expensive and contain other spices to increase their volume. If you find one you like, great...otherwise, here is an easy recipe to make your own.

You will need:

a spice grinder
a small nonstick skillet
a screened strainer or sieve

3 Tablespoons ground cloves
2 Tablespoons ground cinnamon
2 Tablespoons ground black pepper

Grind the cardamom pods with their skins in a grinder until powdered. Pass through a sieve and discard the husks. Place all four ground spices in a dry nonstick skillet and roast over medium heat until heated through, only 30 to 40 seconds (or until it begins smoking). Shake to stir the spices. Transfer to a bowl or plate and cool completely. Store in an airtight container.
Garam Masala is typically added to dishes just before serving, but it is also used during cooking.


3.02.2013

"Well, aloe there lemonade!"

It's no secret that aloe is rather miraculous, so I won't go into details on why it should be your friend. However, I will comment on my new found love, GIGANTIC FRESH ALOE LEAVES from my fabulous Asian produce stand! I've seen them there for ages, but it wasn't until a couple of weeks ago that I actually bought one. It is rather intimidating because of its size, but after a bit of searching, I found instructions on how to properly "fillet" a leaf and prepare it for consumption. Unless you are using the whole thing at once, simply cut off what you need, then stick the cut end of the remaining leaf into a plastic bag, and store it in the fridge unpeeled.

It's easier to peel chunks of the leaf rather than the whole thing at once.
Slimy deliciousness!
The gel is kinda crazy. It's super slimy, cool, crystal clear, and slippery. You can't really eat it without mixing it with something because it is bitter. Mixing it in a smoothie is perfect...just give it a little extra time in the blender to liquify it. It actually adds a nice smooth texture to your beverage with no bitter taste. My favorite preparation so far though is aloe lemonade. It's easy, refreshing, and delicious. Here is my basic recipe. You can use more or less sugar if you want. You can also use honey, but good luck with that. When I tried it, it just stuck to the bottom of the blender.

You will need:

a blender
a pitcher or jug

1/2 cup lemon juice (fresh or bottled)
1/2 cup sugar
6 oz or so of peeled aloe gel
3 1/4 cups water (or soda water)


Place lemon juice, sugar, and aloe in the blender. Blend until smooth. Pour contents into a pitcher or jug and add water. Give it a stir and pour over ice. This will keep for a couple of days in the fridge too. Enjoy!

Feel free to substitute prepared lemonade or frozen concentrate for a shortcut. Soda water makes a great fizzy beverage! Also, try adding berries or any fruit you like to the blender.


Party time!


2.28.2013

Faux Pho.

Here is my version of the classic Vietnamese soup, Pho. Most of you are familiar with it, and to those who aren't, I'm truly sorry. Making Pho is traditionally a long and painstaking process that involves boiling meat and bones with spices to create a rich broth, but I have streamlined that process into a much easier task which still yields a pretty tasty soup. Also, my base recipe is completely vegan. I have included tips and ideas for those who might wanna add some meat and such.

Also, this recipe is specifically designed to make your life easier. By all means, if you want to buy some oxtails and spend a couple of days working on a batch of traditional Pho, knock yourself out! You will have my full and utmost respect and admiration. However, in my house, ain't nobody got time for that! My recipe takes anywhere from an hour to 2 hours, depending on how long you want to simmer your stock. It serves up to 4 people. You have my absolute permission to change, modify, embellish, or adapt it in any way. The point in cooking yourself is, after all, to create something that you love.

You will need:

a large pot with lid
a strainer of some sort, or cheesecloth
a large bowl
large serving bowls

1 onion, unpeeled, roughly cut into eighths
Use the peels and all!
1 large shallot, unpeeled, quartered (optional)
6 to 10 garlic cloves, unpeeled, squashed with the edge of a knife
1 teaspoon Chinese Five-Spice Powder*
10 cups vegetable stock (or chicken or beef...feel free to use more or less)

Bragg Liquid Aminos or soy sauce (optional)
fish sauce (optional)
salt & Pepper

rice noodles, cooked**
bean sprouts
fresh basil (Thai basil is best, but any works)
thinly sliced serrano or jalapeno pepper
sliced green onions
lime wedges
hoison sauce
Sriracha sauce (or your favorite hot sauce)

Place the onion, shallot, and garlic (peels and all) in a large pot over medium heat and "dry roast" the vegetables for several minutes until they are browned, softened, and charred, stirring occasionally. Don't use any oil...the bits that stick to the bottom will make your broth amazing. 

Easy shortcut.
Sprinkle the 5-Spice Powder over the veggies and stir for a few seconds to allow the spices to toast slightly. Immediately add a cup or two of stock and stir well, scraping any stuck bits off the bottom of the pot. Add the rest of the stock and bring to a light boil. Reduce heat, cover pot, and maintain a gentle simmer for at least 25 minutes, and up to an hour.

Now we have to strain the broth and remove the solids. I pour mine into a large bowl (or another pot) through a mesh strainer. You may also use a few layers of cheesecloth. If you don't have either, run to the store or get creative. If you end up with particles in your broth, it isn't the end of the world. Discard the solids (or if you can find a creative use for them, bravo!) Return the broth to the pot and return the pot to the burner. You may season to taste with Bragg seasoning, soy sauce, fish sauce, salt, pepper...whatever you like. Bring it back to a soft boil. Your soup is now ready to serve. (This portion of the process can be done in advance. You can let the broth cool and refrigerate it until you are ready to serve. Simply heat it up and continue for a quick meal!)

To serve, put rice noodles, sprouts, basil, green onions, peppers, and whatever else you like in the serving bowls and carefully ladle the super hot broth over. The broth will slightly "cook" the vegetables in the bowl, which is why it is important that it is hot. Garnish with hoison sauce, a squeeze of lime, and Sriracha, and enjoy!

Pile ingredients on a platter for a fabulous presentation!

*If you wanna go all out, replace the 5-Spice Powder with 2 cinnamon sticks, 2 whole star anise pods, 4 cloves, and about an inch of fresh ginger, coarsely sliced.

**Prepare noodles according to package directions. For best results, time the rice noodles so that they are hot when you add them to your bowl. For convenience, you may cook them, drain them, then keep them in a pot of cool water until ready to use.

Tips:

- Use big serving bowls so you can cram more veggies in without cooling the soup too much.
- To make things even easier, keep a stock paste on hand in the fridge. You will always have instant stock in a flash.
- This recipe can be easily doubled. Just double all the ingredients, and follow the same cooking times.

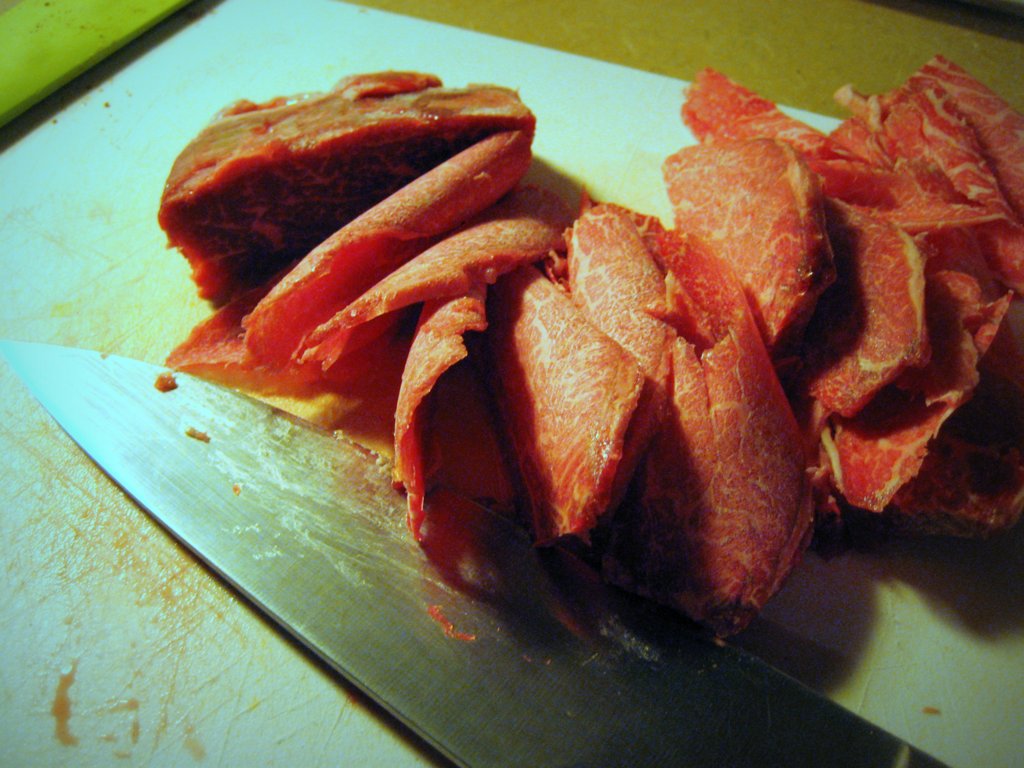
Paper-thin beef.
Ideas:

- Jeff and I like beef in our Pho. I get a steak and place it in the freezer when I start cooking. When it is firm, I use a sharp knife to make paper-thin slices (against the grain). Place the raw beef in the bowl with the veggies, and the broth will cook them perfectly.
- Tofu is a great addition! Slice it thin. For best results, press the excess water out first.
- Plan ahead and make a big batch of broth for the freezer. When cooled, divide the broth into individual servings and freeze! You can have Pho in a snap anytime.
- Chicken wings make a great addition to the recipe. Toss a few in with the onions and garlic and cook with the broth. Just remember to remove and save them before discarding the solids. Place the cooked wings in the serving bowls.


2.25.2013

Jeff & Jeff's Granola.

Perfect.
I mentioned to a friend recently that Jeff and I make our own granola. Her response was "Wow...you must reeeally have a lot of time on your hands." While she is correct (I do) the process really only takes a few minutes, and the result is well worth the effort. Store-bought granola is expensive and overly sweet in my opinion. Plus, I can never choose because there is never one type that has everything I want in my bowl.

The greatest thing about making granola at home is that you can experiment, adjust the sweetness, go crazy, try different grains, and customize each batch to suit your perverted cereal desires. Here is my basic recipe. It makes about 5 cups or so. I typically double the recipe each time I make it, because it keeps for days in an airtight container. And, do you know what makes a fabulous gift for someone you love? A bag of your homemade granola, that's what! (Put a prize in the bottom of the bag for extra brownie points. You're welcome.)

You will need:

3 cups old-fashioned rolled oats (not instant)
1 cup coarsely chopped or whole raw nuts (if using roasted ones, add them after cooking the granola)
1/2 cup unsweetened shredded coconut*
2 Tablespoons packed brown sugar
3/4 teaspoon ground cinammon
1/2 teaspoon ground ginger
1/4 teaspoon kosher or sea salt
1/3 cup honey
2 Tablespoons vegetable oil
1 cup dried fruit

Preheat oven to 300° and line a rimmed baking pan with parchment paper (not necessary, but well worth the investment...add it to your grocery list if you don't have it!). Mix the first 7 ingredients in a large bowl. Heat honey and oil and stir until smooth and thinned. You may do this on a stove top or in a glass measuring cup in the microwave. Drizzle the honey mixture over the dry ingredients and toss to combine. Spread the granola on the baking pan. Bake until golden brown, stirring every 10 minutes for even cooking, for about 40 minutes. Remove from oven, stir one more time, and let cool completely. Mix in the fruit and store in an airtight container at room temperature.

*Any health food store should have unsweetened coconut. It not, you may use the sweetened kind. Just make sure to reduce the amount of brown sugar to half.

Ideas:
-Try sliced almonds, whole cashews, walnuts, pecans, peanuts, or whatever nuts you are nuts for.
- Add more or less coconut depending on what you like. I can't get enough.
-Try adding in 1/4 cup chia seeds, sesame seeds, wheat germ, or oat bran before baking.
-For variety, toss in a cup of bran flakes, corn flakes, or any ready to eat cereal after baking. 
-Yes, this recipe can be made with less sugar, no sugar, more sugar, white sugar, no oil, etc.
-Try substituting a mixture of molasses and honey, or agave syrup, or maple syrup.
-Get creative with spices. Add more or less. Try things like pumpkin pie spice, or a spoonful of vanilla extract in the honey.
-Yes, you can eliminate the salt all together.
-Try raisins, dried cranberries or cherries, banana chips, dried pineapple, dried blueberries, chopped dried mango, candied ginger, chopped dried apricots, prunes, dried figs...whatever you like!
-For sugar free granola, adjust the recipe according to your needs, and add your own sweetener before eating.
-When finished baking, fold up your parchment paper, put it away, and use it again for your next batch.
-For gifts, package your granola in coffee bags and make your own labels!


Enjoy!


2.24.2013

Strutter, indeed.

In December, I ran across this Color Changing LED Light Bulb on Amazon. It seemed too good to be true (for the price), but I ordered one anyway with the hope of aiming it at my disco ball and witnessing something amazing. It even comes with a remote control! Though it did not arrive in time for my New Year's Eve party (I didn't realize it shipped from China and would take 5 weeks), it did not fail to impress. The bulb screws into any standard socket, and can be turned on and off with the remote. The remote allows you to choose 15 different colors including white, 4 patterns (fade is the best), AND the brightness of the light. Crazy.

Oh, and did I mention shipping is FREE? My only regret is not ordering a hundred of them. Check out my hot and sexy video of Imogen Love, dressed as a Sea Monkey, basking in the magical light that is...the Color Changing LED Light Bulb with Remote Control. Then order a few of them.


You're welcome.


Green Chili Chutney.

Here is your first recipe. I found this in Neelam Batra's "The Indian Vegetarian" cookbook and tweaked it slightly for my own taste. It's kind of a staple in my house now. Let me explain why you might want to make it...

1. It's incredibly simple.
2. It's good on just about everything that isn't dessert. Consider it an alternative to hot sauce.
3. It's beautiful and makes a fabulous gift for spice lovers.

Hot & Sour Green Chili Chutney
You will need:

A clean jar with lid

1/4 cup thinly sliced serrano or jalapeno peppers*
1 Tablespoon kosher salt (or sea salt)
1/2 cup red wine vinegar (or your favorite vinegar)
1 teaspoon coarsely ground roasted peppercorns**

Mix the peppers and salt in a jar, and set aside for 2 or 3 hours at room temperature. Pour in the vinegar and add the peppercorns. Store at least 24 hours in the refrigerator before using. The chutney will keep for months if refrigerated.

*Wear gloves or at least wash your hands thoroughly and immediately after handling peppers! Do not forget or you will end up touching your lips, eyes, nose, or...worse...and sincerely regretting your laziness.

**To roast whole black peppercorns, put them in a dry pan over medium heat and stir occasionally until they begin to smoke and pop. Remove from heat, let them cool, and grind. If you don't have a grinder, place them in small plastic bag on a cutting board and crush with a rolling pin, heavy glass, hammer, laptop, or whatever.

Yawn.

I was awake for hours last night wondering how to approach my blog this time around. Should it be all recipes? Should it be a photo gallery with recipes? Should I include stupid stories and pictures of my cats doing those things that all cats do? You see, I've done this a hundred times. I get an idea, I get hung up on one photo that I wanna display somehow, then I spend a whole day setting up my brand new blog only to forget about it by the week's end. It's really no big deal, because honestly, at the end of the day, no one cares. But I do kind of want a little tiny space, besides Facebook, to share the things that make me happy. And I want it to be special...if not for anyone else, then for myself.

Gus & the sunshine.
So, I took a deep breath, cleared my head, and I asked myself "Why would I visit someone's blog?" The answer was for inspiration and to learn new things. That's when I figured it would be best just to keep it simple and offer just that...things that might inspire others to travel, cook, or create...things that they might not know. For example, do you realize that if you crumple up your parchment paper into a ball and then straighten it again before placing it on your baking pan, it will lie flat and won't curl at the edges? Because I did NOT know that until recently. And it changed my life. Granted, I am seriously impressed by the "little things" most of the time, but tips like that can potentially add years to a person's life! Hopefully, you can find something here that enriches your life a bit as well. Whether it IS a photo of my cat, mid-yawn, a recipe, a mind-blowing kitchen tip, a travel story, or simply a link to something wonderful, I do plan to step up and provide! Feel free to subscribe, share, or follow me if you'd like. And be sure to try a recipe or two, because good food is awesome.

2.23.2013

Here we go again.

Sunset in Long Beach, WA 2/13

Okay. Maybe I'll give this blog thing another shot. It's a brand new year, and I once again have time on my hands (I will never take that for granted again).

1.16.2013

Salt snob.

Fleur de sel just makes life better.
I am a salt snob. I admit it. I have actually not picked up a shaker of table salt in years. I don’t even have it in my house. Of course I used to believe that salt is salt…and the “fancy” ones were simply a gimmick. But oh how wrong I was. My first switch was from table salt to plain old “sea salt”. I felt better about using it, but honestly, I couldn’t taste much difference when it came down to it. Then, a friend of mine forced me to try fleur de sel, the “flower of salt”. I probably rolled my eyes, but what I really remember was the incredible taste…the slight crunch…the revelation. Had I been a fool all those years? Yes, I had…and there was no looking back.
Fleur de sel is only one of many different salts that I have sampled and enjoyed, but it is my favorite. Salt is kind of like Tequila to me. One isn’t necessarily better than the rest; it’s simply a matter of taste. They are different, and they each have notable characteristics. I won’t bore you with too much salt talk, but I will break it down for you based on what I have learned…

Kosher Salt is a necessary kitchen staple. Buy it. That’s the one in the box that people usually use to rim margarita glasses. This is the one you should use when cooking. If a recipe calls for salt, use kosher salt. However, my advice is to reduce the amount called for and finish the dish later with a nice finishing salt.

Sea Salt varies from source to source. It is also acceptable for cooking, but reduce the amount because I find that it tends to impart a very salty flavor. It works as a finishing salt, and is quite inexpensive, but treat yourself and go for the good stuff!

Fleur de Sel, and other fancy salts out there have one purpose for me (though I have rimmed my margarita glass with it…and it was amazing)…and that is for finishing a great meal. You will be amazed at how much flavor a small pinch of it can coax out of your meal. Sometimes, it miraculously pulls all of the flavors together. It is quite pricey, but do your research. You can sometimes find a pound or so for around $12 bucks online. That’s a bargain! And remember...a little goes a long way.

There are many others out there to try including Grey Sea Salt, Real Salt, Hawaiian Sea Salt, etc...even Smoked Salt! Again, it's not about better or worse, it's about taste and variety. While I certainly love them all, my advice is to choose one or two of your favorites at first and don't get overwhelmed by the selection.

Oh, and throw away the table salt. Now. It is bitter, offensive, and useless. Or better yet, run a nice hot bath, add a few drops of lavender oil, and dump a few tablespoons of it in the water for a nice relaxing spa day.

8.23.2008

"baby tunnel"


in a drunken stupor, i ordered this online for the cats. i figured they would have a blast with it...they still do of course, but they only inherited it after jeff and i finished playing with it.

8.08.2008

8.06.2008

visitor

every morning. for peanuts.

7.27.2008

bonfire at alki beach

alki beach is in west seattle. jon hosted a bonfire complete with beer and s'mores!